Quick Answer - Cleanup After Roof Replacement
A professional roofing contractor should leave your property clean after a roof replacement, but there are things you should check yourself. Run a magnetic nail sweep across your entire yard, driveway, and walkways. Inspect landscaping for damage. Check your attic for debris that fell through. Walk the property looking for missed shingle pieces, packaging, and nails. Most issues should be addressed by your contractor before final payment.
Post-Replacement Cleanup Checklist
- - Magnetic nail sweep of entire property (most critical)
- - Inspect gutters for roofing debris
- - Check landscaping and exterior for damage
- - Walk the attic looking for fallen debris and daylight
- - Verify all old materials were hauled away
- - Document any issues before making final payment
What Your Roofing Contractor Should Clean Up
Before you do your own post-project inspection, understand what a professional roofing company should handle as part of the job. At Gimo's Roofing, cleanup is built into every roof replacement project, and we do not consider a job complete until the property is clean. For larger tear-offs or DIY cleanup jobs, homeowners often pair their project with a Jacksonville dumpster rental to keep debris contained from day one. Here is what a reputable contractor should do.
During the Project
- Tarps around the perimeter: Drop cloths or tarps should be placed around the base of the house to catch falling debris, nails, and shingle pieces during tear-off
- Dumpster placement: A roll-off dumpster should be positioned to minimize yard damage and provide efficient debris disposal
- Debris management: Old shingles and materials should go directly into the dumpster, not piled on the ground
- End-of-day cleanup: The crew should do a basic sweep at the end of each work day, especially if the project spans multiple days
After the Project
- Magnetic nail sweep: At minimum, the contractor should run a rolling magnetic sweeper across the yard, driveway, sidewalks, and all areas where debris could have fallen
- Debris removal: All tarps, packaging, shingle wrappers, cut pieces, flashing scraps, and general waste should be collected and disposed of
- Gutter cleaning: Gutters should be cleaned of all granules, nails, and debris that accumulated during the project
- Dumpster removal: The dumpster should be picked up within 1-3 days after project completion
- Final walkthrough: A reputable contractor will do a walkthrough with you to identify any remaining issues
Red Flag Warning
If your contractor does not include cleanup as part of the project or asks for extra payment for debris removal, that is a significant red flag. Professional roofing contractors include all cleanup and haul-away in their project price. Make sure cleanup expectations are written into your contract before the project begins.
Need Professional Help?
Gimo's Roofing offers free inspections and estimates throughout Jacksonville and Northeast Florida.
The Nail Sweep - the Most Important Cleanup Step
Roofing nails are the biggest post-project hazard. A typical roof replacement uses 8,000 to 12,000 nails, and despite every precaution, some will end up in your yard, driveway, flower beds, and walkways. A single roofing nail can puncture a tire, injure a barefoot child, or hurt a pet.
How to Do Your Own Nail Sweep
Even after your contractor does their magnetic sweep, we strongly recommend doing your own pass. You can rent or buy a rolling magnetic sweeper at any hardware store for $25-40. Here is how to be thorough.
- Start with the driveway and walkways. These are the highest-traffic areas where a nail puncture is most likely. Roll the magnet slowly in overlapping passes
- Sweep the entire yard. Cover the lawn in systematic passes, especially the area directly around the house where most debris falls. Go 15-20 feet out from the house on all sides
- Check flower beds and mulch areas. Nails hide easily in mulch and loose soil. A magnet sweeper works well here because it picks up nails even through mulch
- Sweep the street and gutter line. Nails that land on the roof may have slid or bounced into the street. Check the road surface and gutter area in front of your property
- Check twice near the dumpster location. The area where the dumpster sat is a nail hotspot from loading debris
- Repeat in 2-3 weeks. Rain, foot traffic, and lawn mowing can expose nails that were buried in grass or soil. Do a second sweep a few weeks after the project
Alternative Nail Finding Methods
- Magnetic nail sweep tool: The best option. A rolling magnet on a handle covers ground quickly and efficiently
- Shop magnet: A large handheld magnet dragged through grass catches nails effectively
- Bare foot test (not recommended): Some homeowners walk their yard barefoot to find nails, but this is risky and not thorough
- Visual inspection: Walk the property during low-angle sunlight (early morning or late afternoon) when nail heads cast shadows that make them easier to spot
Checking Your Yard and Landscaping
Roof replacement is inherently hard on landscaping. Heavy materials are carried around the house, ladders are leaned against the structure, debris falls from two or more stories, and a dumpster sits on the driveway or yard. Here is what to inspect and document.
Common Landscaping Damage
- Crushed plants and shrubs: Plants directly below the roof edge often get damaged by falling debris despite tarps. Foundation plantings and hedges are most vulnerable
- Lawn damage: Heavy foot traffic, ladder placement, and dumpster weight can kill grass and compact soil. Damaged lawn areas typically recover within 4-6 weeks with regular watering
- Driveway damage: Dumpsters and heavy material pallets can crack concrete or leave marks on asphalt driveways. Document any new cracks before the dumpster is removed
- Fence damage: Falling debris, ladder placement, or crew access can damage fences adjacent to the work area
- Gutter damage: Despite care, gutters can be dented, bent, or knocked loose during tear-off and installation. Verify all gutters are straight, level, and securely attached
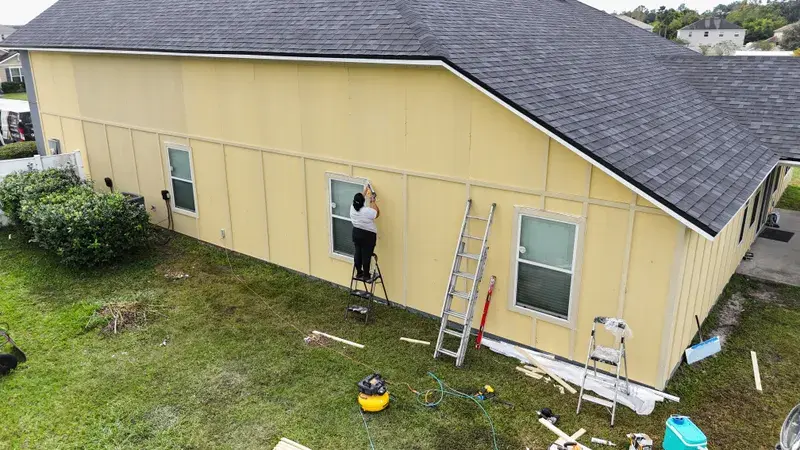
- Exterior paint or siding damage: Ladders can scuff siding and paint. Check all areas where ladders were placed for marks or damage to your home's siding
Documenting Damage
Take photos of any landscape or property damage before your final payment. A professional contractor will address legitimate damage claims. Having pre-project photos (taken before the crew arrives) alongside post-project photos gives you clear documentation if any dispute arises.
Interior Inspection After Reroofing
The work happens on the outside, but the vibration, debris, and occasional mishap can affect the inside of your home too. Do a thorough interior check after your roof replacement is complete.
Attic Inspection
- Look for debris: Nails, shingle pieces, and wood fragments from the old roof can fall into the attic through gaps in the decking during tear-off
- Check for daylight: With the attic lights off, look for pinpoints of light coming through the new roof. Small spots of light typically indicate a nail that missed the rafter, which should be sealed
- Verify ventilation: Confirm that attic insulation is not blocking soffit vents and that any new ventilation components are properly installed
- Check existing damage: The vibration from tear-off can dislodge items stored in the attic. Verify nothing has shifted or fallen
Ceiling and Wall Inspection
- Look for new cracks: The impact of tear-off can cause hairline cracks in drywall or plaster, especially in older Jacksonville homes
- Check ceiling fixtures: Ceiling fans, light fixtures, and smoke detectors can loosen from vibration
- Verify no water stains: If there was exposed decking during the project and it rained (common during Florida's afternoon storms), look for fresh water stains on ceilings
Your Final Roof Inspection Checklist
Before making your final payment, walk the property with your contractor and verify the following items. You do not need to get on the roof, most of this can be checked from the ground with binoculars.
- Shingle alignment: Shingle courses should be straight and evenly spaced. Wavy or crooked lines indicate sloppy installation
- Ridge cap: The ridge cap should be neat, centered, and sealed with roofing cement at the end points
- Drip edge: Verify drip edge is installed along all eaves and rakes with a clean, straight appearance
- Flashing: All flashing around chimneys, walls, vents, and skylights should be tight and properly sealed
- Pipe boots: Every vent pipe should have a new boot that sits flat against the shingles
- Gutters: Clean, level, securely attached, and free of dents or damage
- Ventilation: Ridge vent (if installed) should be straight and properly capped
- Starter strip: The bottom edge of the roof should have a clean, even overhang with no exposed starter strip
- Cleanup: No debris, nails, shingle pieces, or packaging remaining on the property
- Documentation: Receive your warranty paperwork, permit inspection results, and manufacturer registration
Cleanup Timeline - What to Expect and When
Understanding the typical timeline helps set expectations for when your property will return to normal after a roof replacement.
Post-Project Timeline
- - Day of completion: Contractor cleanup, magnetic sweep, dumpster still on-site
- - 1-3 days after: Dumpster removed, final debris pickup
- - 1 week after: Do your own nail sweep, document any remaining issues
- - 2-3 weeks after: Second nail sweep after rain exposes buried nails
- - 4-6 weeks after: Lawn damage begins recovering, final landscaping assessment
- - After first heavy rain: Check interior for any leaks, inspect gutters for flow
- - 6 months after: Schedule a follow-up inspection, check for any early issues
Get a Free Roofing Estimate
Instant online pricing or schedule an in-person assessment. Financing available from $99/month.
You Might Also Read
- Roof Replacement Cost in Jacksonville FL - 2026 pricing guide
- Best Roofing Materials for Florida - Complete comparison
- How to Choose a Roofing Contractor - Find quality contractors
Key Takeaways - Post-Replacement Cleanup
- - Your contractor should handle all cleanup as part of the project price
- - Do your own magnetic nail sweep even after the contractor sweeps, and repeat in 2-3 weeks
- - Document any property damage with photos before making final payment
- - Inspect your attic for fallen debris and verify ventilation
- - Check ceilings for new cracks or water stains from the construction process
- - Walk the final inspection checklist with your contractor before signing off
- - Keep warranty paperwork and schedule a 6-month follow-up inspection
At Gimo's Roofing, we take cleanup seriously because we know your property matters to you. Our crews use tarps, magnetic sweepers, and a detailed cleanup checklist on every roof replacement and repair project. Call (904) 606-5313 for a free roofing estimate and experience the difference a professional crew makes.